
Builder Payment Schedules and Deposits
Never pay ahead of the work – deposits, milestones and retention that protect you
Quick answer
Builder payment schedules and deposits – how much upfront is reasonable, milestone structuring and the retention that protects you.
12 min read
On this page
How can a simple 1% deposit stop a renovation from becoming a costly dispute?
Navigating finances for a loft conversion or home addition starts with a clear builder payment schedule. A typical loft project often begins with a 1% deposit to lock the agreement between homeowner and contractor.
At buildingpricessouthafrica.co.za we provide our pricing guidance so you understand how to link payments to milestones. Clear terms help the construction team work smoothly and reduce the risk of disputes.
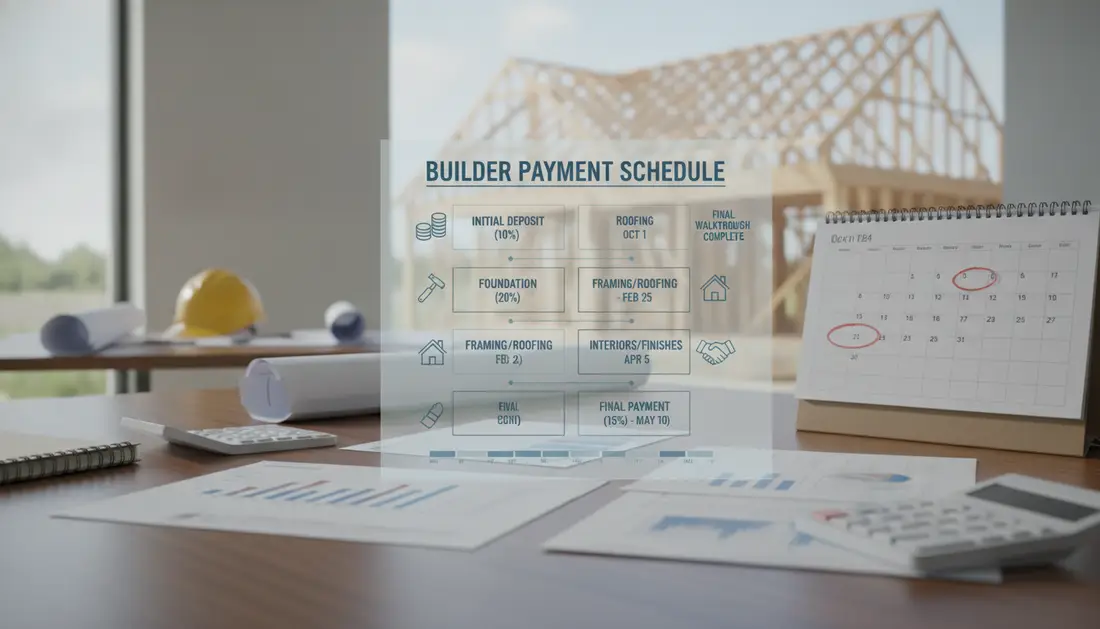
Use our quote request process to connect with independent contractors who value staged payments tied to progress and completion. Confirm inclusions, exclusions, timelines, warranties and the final cost in writing before work starts.
Transparent structures build trust, protect money and keep your project on time and on budget.
Understanding the Builder Payment Schedule in South Africa
Linking payments to completed work keeps your project clear and fair. The payment schedule for a home extension is part of the contract and helps avoid friction between you and the contractor.
Construction is a service industry; payments should reflect progress and be made in arrears where possible. That protects you from paying for work not done and gives the team incentive to finish to completion.

Treat a standard payment plan as negotiable. Builders often ask for funds ahead to manage cashflow, but you should insist on stages that match actual site milestones. It reads well alongside builder’s guarantees.
- Use a formal contract to set requirements for different project types and costs.
- Avoid one-size-fits-all templates: every job has unique time and management needs.
- Link funds to progress: this is sensible project management and reduces disputes.
When you request quotes through our platform, check that proposed schedules and payment terms are clear in writing. That small step protects your budget and keeps the project on track.
Why Fair Payment Terms Protect Your Project
A sensible payment plan creates balance between cashflow needs and project risk. Fair terms act as a practical lock-in that keeps both parties working toward the same goal.

The Tension Between Homeowner and Builder
There is an innate tension: you prefer payments made in arrears, while contractors often ask for funds up front to buy materials and cover labour.
Agreeing fair terms early reduces that strain and lowers the chance of disputes as the job progresses.
Balancing Cashflow and Risk
A balanced payment schedule gives the team enough capital to manage costs while you retain control over the budget.
“Clear, written terms are the best defence if disagreements arise.”
Use standard contract templates to record milestones, payments and progress. This protects trust, reduces risk and speeds management decisions on site.
- Link payments to visible progress to confirm work is done.
- Agree how and when costs for materials are covered.
- Document all terms so you can resolve disputes quickly.
Structuring Your Payments for Maximum Security
Secure your project by making every instalment conditional on inspected milestones. Link each release of money to visible, agreed work. This gives contractors the surety to claim funds and you the confidence to release them.
Never tie funds to time alone. That invites claims for mere attendance rather than real progress. Insist on physical completion and a site inspection before you sign off any instalment.

- Ask for a detailed cost breakdown per milestone.
- Match larger payments to bulk material purchases and labour peaks.
- Confirm the contractor has working capital so they do not rely on excessive upfront funds.
- Only release money once the stage is inspected and accepted.
| Milestone | Typical Share | What to verify | Risk / Benefit |
|---|---|---|---|
| Foundations | 20% | Excavation, footing depth, inspected | High benefit: secures early materials; low risk if inspected |
| Structure & framing | 30% | Framing complete, level checks | Builds progress; requires visible work |
| Enclosure to practical completion | 40% | Roof, windows, external finishes | Major costs covered; inspection crucial |
| Retention & handover | 10% | Snagging list and fixes | Protects owner; reduces walk-off risk |
Balance risk and cashflow by using this structure. A clear payment schedule in your contract reduces disputes and keeps the construction project on track.
Navigating Deposit Norms and Initial Outlays
Start your project with clear rules about deposits and early costs. A well-defined deposit protects you and clarifies expectations before any work starts.

Standard practice is to ask for a small sign-on sum. For new residential builds a 5% deposit is common. It shows commitment rather than covering major costs.
Material-Linked Deposits vs Upfront Fees
Material-linked deposits are acceptable when specific items must be ordered or manufactured. Insist these be itemised as separate staged payments in the contract.
- Never pay excessive up-front sums: avoid anything close to a 50% deposit; it puts your finances at risk.
- Document every deposit: link it to the written payment schedule and to the agreed project start date.
- Compare offers: use our quote request process to see how different contractors handle initial outlays.
Effective management of initial costs keeps your cashflow steady and ensures progress can begin without undue exposure.
“Confirm deposit terms with your bank or guarantee provider to keep the project protected.”
Linking Payments to Tangible Construction Milestones
Tie each instalment to a clear, inspected stage on site to avoid paying for work not done. A simple structure clarifies expectations and keeps the team aligned with progress.
Foundation and Framing Stages
Fund critical early works: allocate funds for opening up, steel and framing so the structure is secure before larger spends.
Use the loft conversion percentages as a guide: 10% opening up, 20% steel and 20% framing/roofing. Document each milestone on the contract and verify on site.
Enclosure and First Fix
Match larger instalments to enclosure and first fix. This covers roofing, windows and initial mechanical runs.
Ensure materials are tracked and that the cost share for these stages is clear in your plan.
Snagging and Retention
Hold a small retention—2% for four weeks after practical completion—to ensure snagging items are fixed.
Final payment should be big enough to motivate finishing the snag list and confirming completion.
| Milestone | Typical % | Verify on site |
|---|---|---|
| Opening up / Foundations | 10% | Excavation, footings, damp proofing |
| Steel & Framing | 40% | Beams, roof structure, level checks |
| First fix & Enclosure | 20% | Roof, windows, mechanical runs |
| Snagging & Retention | 8–12% (incl. 2% retention) | Snag list resolved, four-week retention period |
Identifying Red Flags That Signal Potential Walk-offs
Early red flags usually show in how requests for funds match visible work on site. If someone asks for money for merely turning up, treat that as a warning.
Watch for these signs:
- A contractor requests payments ahead of agreed stages without evidence of work done.
- They refuse to link instalments to clear milestones or on-site inspections.
- They repeatedly ask for funds outside the written payment schedule or change its terms.
These behaviours often point to poor cashflow or weak project management. That raises the risk of walk-offs and disputes at crucial stages.
We advise you to insist on photographed evidence, inspection notes and written confirmation before releasing further payments. Use our quote request process to connect with contractors who respect written terms and maintain trust throughout the job.
“Only pay when milestones are verified on site — that is your best protection.”
Documenting Work Releases and Site Inspections
Make sure every transfer of funds is backed by an inspection note and photographic proof of the completed stage. That practice creates a clear record for both parties and reduces disagreement later.
Keep a dated log that lists the date, the milestone reached, the amount released and who signed off on site. Store photos with each entry so you can show exactly what work was done at that time.
Before any final payment, arrange a thorough inspection and a signed completion list. Only release the last instalment once snagging items are recorded and time-limited fixes are agreed in writing. This pairs naturally with building snag list before final payment.
- Document each release: date, amount, milestone and sign-off.
- Inspect before you pay: verify work done and quality against the contract.
- Use photos: visual records help resolve disputes quickly.
- Sign stage acceptance: both parties should sign before money changes hands.
“A clear trail of inspections and releases protects money and keeps projects on track.”
Leveraging Professional Guidance for Contractor Connections
Finding reliable contractors starts with the right guidance. Our platform helps you request up to three quotes, or up to five where available, so you can compare costs and approaches quickly.
Use our quote request process to shortlist independent tradespeople who commit to clear, milestone-based terms. We provide pricing guidance so you can judge each quote against realistic labour and material costs. Compare the figures across all our building cost guides.
Interview potential contractors. Ask about their experience with onsite inspections, how they manage milestones, and who will handle warranties and site supervision.
Remember: our platform does not employ contractors. We connect you to independent professionals who handle site visits, final quotes and the work itself.
- Request multiple quotes to compare scope and cost.
- Confirm what is included: finishes, access, approvals and any exclusions.
- Get written terms for milestones and inspection sign-off.
“Professional guidance helps you ask the right questions and set clear expectations.”
Ensuring Long-term Project Success and Financial Clarity
Clear financial rules and visible milestones keep your renovation on track and your budget intact.
Set a simple payment schedule that links each instalment to an inspected milestone. That structure reduces risk and helps the team deliver steady progress.
Confirm contract terms for deposits, stage percentages and final payment in writing. Use photographs and dated inspection notes to back every release of funds.
Our platform helps you compare quotes and check cost factors so you can balance cashflow and quality. Prioritise transparency to avoid disputes and protect your house.
Follow these steps and you increase the chance of on-time completion, fair costs and trusted contractors for future projects.
FAQ
What is a typical payment plan for a house build in South Africa?
Typical plans break the job into stages tied to work completed and verified. Common stages are a small deposit for materials, payment on foundation and slab completion, a percentage at wall framing and roof structure, another payment when the building is watertight, a sum at first-fix services, and a final retention released after snagging. Confirm exact percentages and milestones in writing with your contractor or project manager.
How much should I expect to pay as an initial deposit?
Most homeowners pay a modest deposit to secure the start date and cover early material orders. Expect 5–10% of the contract value for standard projects, but material-linked deposits may be higher when the client orders long-lead items. Always ask for invoices for materials bought and get the deposit recorded in the agreement.
How can I link instalments to tangible progress on site?
Use clear, measurable milestones: footing and slab poured, frames erected, building enclosed (roof on and windows in), first-fix complete (wiring and plumbing rough-ins), and practical completion. Tie each instalment to an inspection, site photographic evidence, or a signed work release.
What is retention and why is it important?
Retention is a withheld portion of the contract sum, typically 5–10%, kept until defects are resolved after practical completion. It incentivises contractors to finish snagging and fix issues. State the retention amount, release conditions, and defect liability period in the contract.
Are material-linked deposits common and fair?
Material-linked deposits are common when bespoke or imported materials are required. They’re fair if the builder provides receipts and guarantees for those purchases. Insist on supplier invoices and ownership proof for expensive items before releasing significant sums.
How do I reduce the risk of a contractor walking off the job?
Reduce risk by staging payments to visible progress, holding a reasonable retention, checking references and CIDB or NHBRC registrations, and requiring a written agreement with clear timelines. Avoid large up-front payments and ensure everyday communication and site visits during key stages.
What should a written payment clause include?
The clause should list instalment amounts or percentages, exact milestones, required evidence for each release (photos, inspection reports), retention terms, variation handling, payment methods, and remedies for late or incomplete work. Clear dispute-resolution steps and payment timelines help avoid misunderstandings.
Can I ask for independent inspections before releasing funds?
Yes. You can require an independent quantity surveyor, building inspector, or project manager to certify stage completion before payments. Budget for that cost; independent verification adds protection and helps resolve disagreements objectively.
How do variations and cost overruns affect payment timing?
Variations should be recorded in a written instruction with cost and time impacts before work starts. Agree on how variation sums are invoiced and when they are payable. Avoid paying for unapproved extras; withhold payment until a variation is authorised in writing.
What are fair percentages for major milestones?
A common split is: 5–10% deposit, 20–25% on slab/foundation, 20–25% on frame and roof, 20% on enclosure and first-fix, 20% on practical completion minus retention, and 5–10% retention. Adjust percentages for project size, complexity, and material costs. Put the agreed split into the contract. It reads well alongside when a building project goes wrong.
Should I pay by cash, EFT or card?
Pay by traceable methods — EFT or card — so there’s a paper trail. Avoid large cash payments. Request VAT invoices where applicable and keep bank confirmations linked to the contract for accounting and possible dispute resolution.
How long should final retention be kept after practical completion?
Retention is often held until the defects liability period ends, commonly 3–6 months. Complex work may warrant longer. Define the period and the process for reporting and fixing defects before signing the contract. For what this typically costs, see how our cost guidance works.
What red flags should I watch for in a contractor’s payment requests?
Watch for requests for large up-front sums, refusal to provide invoices for materials, pressure to pay before inspections, or sudden demands for higher instalments without written variation orders. Poor record-keeping and unclear timelines are also warning signs.
Can a payment plan speed up project completion?
A well-structured plan aligned to milestones helps cashflow for both parties and can reduce delays. It incentivises steady progress while protecting you financially. Ensure the plan is realistic, tied to inspections, and reflects actual site progress.
Where can I get professional help to set up fair terms?
Use a quantity surveyor, building inspector or construction attorney to review terms and milestone wording. Our platform can connect you with independent contractors and professionals who provide site visits and quotes; always confirm final details and warranties in writing with the chosen contractor.
Ready to compare?