
The Plumbing Rough-In Stage Explained
Before walls close – what gets installed, tested and signed off
Quick answer
The plumbing rough-in stage explained – what's installed before walls close, the pressure tests, and the sign-offs to insist on.
11 min read
On this page
Have you ever wondered what “plumbing rough in meaning” really means, and why it can decide the success of your build?
This phase sets the layout for all water and drain routes before fixtures appear. It ensures pipes sit correctly, sizes match the design and drainage follows code.
At buildingpricessouthafrica.co.za we guide homeowners through this stage and offer our platform for sourcing trades. Use our quote request process to connect with an experienced plumber who will check positions, connections and likely issues.
Why care now? Fixing lines later costs time and labour, and can cause leaks or safety failures that halt construction.

Clear planning at this stage keeps your project on schedule, meets local building codes and saves money over the life of your home.
Understanding the Plumbing Rough In Meaning for South African Homes
Once the foundation and frame are complete, the next step defines where water and waste will run through your walls.
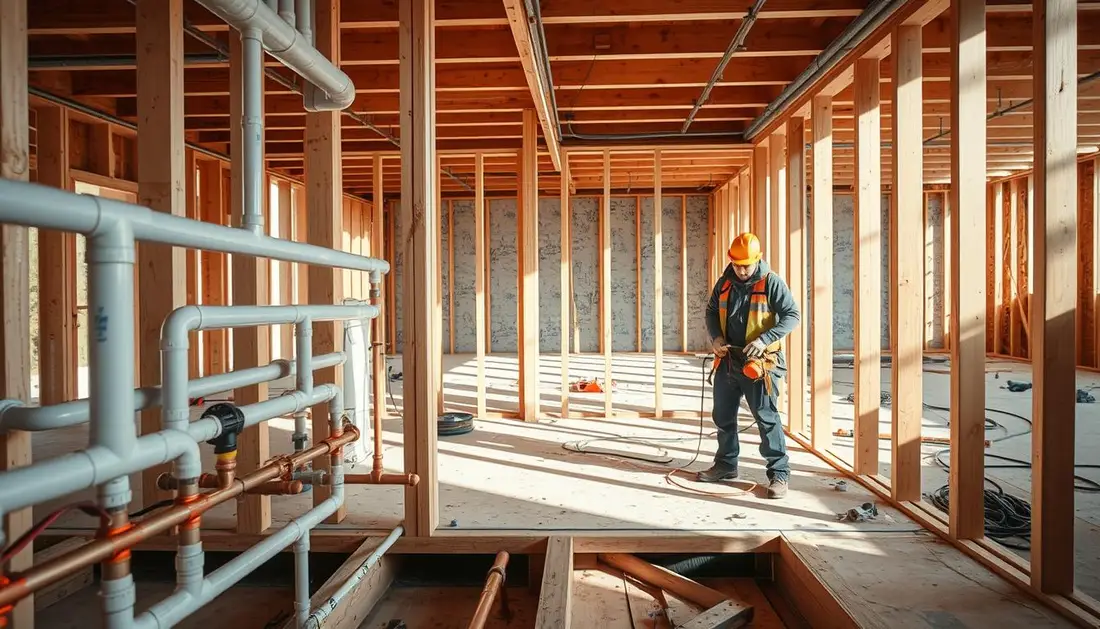
This stage happens after foundation and framing and before walls are closed and taped. Installers route water lines and drain pipes while the structure is open so access and inspection are simple.
The rough-in plumbing phase sets the layout for your plumbing system and supports installation of key fixtures like toilets and sinks. Correct placement here keeps your project on schedule and reduces costly fixes later.
Follow local building standards to ensure the system handles daily demands in a modern South African home. Accurate line routing preserves structural integrity and prevents future leaks or blocked drains.
- Performed immediately after foundation and framing to protect structure.
- Lines and drains are run through open walls for easy inspection.
- Positions must be final before walls are sealed during construction.

The Role of Rough-In Plumbing in Construction Sequences
Early layout work on supply and waste lines determines how the rest of the build flows.
Stage definition
This stage is the first step for any new home or addition. Trades run supply and drain routes while walls remain open. The plumber maps positions for fixtures and ties lines back to the main feed.
Where it sits in the build
The typical sequence follows foundation, framing, then this phase, inspection and finish work. Coordinate timing to avoid delays and extra labour.
- Occurs after foundation and framing are complete.
- Sets fixed locations for fixtures and connections.
- Must pass inspection before walls close and finishes start.
| Stage | Typical Time | Responsible |
|---|---|---|
| Foundation & framing | Weeks 1–4 | Builder |
| Rough phase | Week 5 | Plumber |
| Inspection & finish | Weeks 6–8 | Inspector / Trades |
Coordination saves time and cost. Use our platform to request quotes and ensure the work matches your project scope and approvals.
Essential Components and Materials for Your System
Durable pipes and well‑specified valves form the backbone of any reliable home supply and waste network.
Common materials are PVC, copper and PEX. Each has strengths: PVC for waste and vents, copper for high‑temperature supply, and PEX for flexible, cost‑efficient water runs. This pairs naturally with our guide to copper vs pex piping.

The rough-in plumbing stage requires correct pipes installed to support both water supply and drain lines. Choose sizes that match each fixture to keep pressure steady and drains clear.
“Quality valves and neat routing reduce leaks and simplify future maintenance.”
- Shut‑off valves and supply lines for ease of isolation and service.
- Waste lines, vent pipes and drain traps to protect against blockages and odours.
- Confirm material choices with your contractor so the installation suits your home and budget.
We offer guidance on fixtures such as toilets and sinks and can help you request quotes for a correct, long‑lasting installation.
Planning Your Layout and Utility Connections
Start layout work by marking every fixture and tracing each supply and waste route on your site plan. This step makes clashes obvious before any pipes are cut or walls closed.

Determining Pipe Sizes and Vents
Decide pipe sizes by fixture type. Toilets and sinks need specific diameters to meet local building codes and ensure reliable drainage.
Vent pipes keep sewer gas out and support smooth flow. Map vent runs so they rise uninterrupted to the roof or join approved stacks.
“Accurate layout and correct venting reduce call-backs and long-term service costs.”
- Mark each toilet, sink and major appliance and note required pipe diameters.
- Plan vent paths to avoid long horizontal runs that trap waste.
- Map all connections so contractors quote the right labour and materials.
We help you check sizes, compliance and budget impacts so your project meets local building codes and is ready for fixture installation.
The Installation Process for Water and Drainage Lines
Installing supply and sewer lines starts with careful excavation and clear grade control. This first step places the main water supply and sewer runs where they belong before any walls close.
Excavation and Main Lines
Crews dig trenches to the required depth and slope. Gravity is key for the drain system, so pipes must have a steady downward fall to the sewer.
Drilling and Routing
A qualified plumber drills through structure to route supply lines and vents. Holes are kept neat and protected where lines pass through beams and walls.
Completing Tie-Ins
All connections are joined and pressure-tested to spot leaks. Secure tie-ins mean toilets, sinks and other fixtures will work when fitted.
Monitor the installation behind closed walls. Confirm angles, materials and tag locations on your plan so inspections pass first time.
Time and labour: expect coordination between trades and an inspection before walls are sealed.
| Task | Typical Time | Why it matters |
|---|---|---|
| Trenching & grading | 1–2 days | Ensures correct fall for drainage |
| Routing through structure | 1 day | Prevents damage where lines pass walls |
| Tie-ins & pressure test | Half day | Detects leaks before finishing |
Critical Inspection Points Before Closing Walls
Before walls close, a formal inspection confirms every pipe sits where it should and functions correctly.
Carry out the inspection while the structure is open. This is the final chance to check placement of water lines, vents and drain runs for toilets and sinks.
Pressure testing is standard. Test supply lines and the waste system to find leaks before drywall is hung.
Follow local building codes and record each result. Clear documentation helps when you request quotes or seek approvals later.
- Verify pipes and vents are fixed and supported to prevent movement when walls close.
- Confirm correct falls on drain lines to avoid future drainage issues.
- Ensure shut-offs and access points are accessible for service and safety.
“A thorough check now prevents costly repairs and keeps your construction schedule on track.”
We recommend you document the inspection and keep copies for the builder, contractor and local authority. This protects your home and ensures the installation meets the expected standards for the next stage.
Owner Walk-Through Checklist for Rough-In
A thorough owner walk-through at this stage prevents costly changes once finishes start.
Use this short checklist while you inspect the work before walls close. Take notes and compare positions to your blueprints.
- Fixture placement: Verify that the rough-in plumbing for toilets and sinks is exactly where your plan shows.
- Pipe slopes: Check that waste lines have a steady fall to the drain to avoid later blockages.
- Secure pipes: Ensure all pipes are fastened to studs or walls so they will not move when finishes go up.
- Vents and ties: Confirm the vent pipes are installed and tied into the main system correctly.
- Shut-off access: Make sure shut-off valves are clear and reachable for future maintenance.
This process saves time at inspection and avoids extra cost during installation of fixtures.
“A careful walk-through gives you peace of mind that the foundation of your home’s plumbing system is solid.”
We provide guidance on what to expect during this inspection and can help you request quotes from a qualified plumber for any adjustments found.
Managing Costs and Contractor Assessments
A precise brief for contractors keeps quotes predictable and reduces surprises during installation.
Our pricing guidance helps you weigh scope, site access and material choices for the rough-in plumbing stage. Costs vary by labour, finishes and regional rates. For what this typically costs, see plumbing rough in costs.
Factors Influencing Your Quote
Key items that change a quote:
- Scope: number of toilets, sinks and major fixtures and how many supply lines are needed.
- Site access: tight yards or multi-storey work adds time and cost.
- Materials: PVC, copper or alternative pipes choice affects the price and longevity.
- Labour and region: local contractor rates and travel time influence the final figure.
- Approvals and codes: meeting local building codes may require extra inspections or materials.
Use our quote request process to get independent assessments from local contractors. Always confirm inclusions, exclusions, timelines, payment terms and warranties in writing.
“Compare multiple quotes to secure fair value and reduce risks to your project.”
Ensuring Long-Term System Reliability
A dependable system begins with accurate pipe layout and ends with scheduled maintenance.
Quality materials and proper testing at the rough-in plumbing stage reduce future leaks and safety risks. Test supply and drain lines both before and after walls close to find faults early.
Keep a simple record of the installation layout, vents and shut-offs. This saves time and cost when a plumber returns for service or upgrades.
Follow local building codes and do regular checks on pipes and fixtures to protect your home investment.
Need help finding a contractor? Visit buildingpricessouthafrica.co.za and request quotes from experienced teams to keep your project reliable for years.
Get the detail from plumbing rough-in costs. This pairs naturally with our guide to moving kitchen services involves.
FAQ
What does the plumbing rough-in stage involve?
The rough-in stage is where supply and drainage lines are laid out and fixed before walls, floors or ceilings are closed. It includes installing water supply lines, soil and waste pipes, vents, underground mains and stub-outs for fixtures. This work sets the positions for sinks, toilets, showers and appliances so that final fittings connect without extra pipework or structural changes.
When does the rough-in usually happen during a South African build?
The rough-in is an early construction phase that takes place after foundation work and structural framing but before insulation, plastering or tiling. In a typical sequence, electricians and HVAC will coordinate with the plumbing team so services are routed correctly through the studwork and slab openings. It reads well alongside moving bathroom plumbing.
Who should carry out rough-in work and do they need to be licensed?
A qualified plumber registered with your local municipal authority should carry out the rough-in. They must follow local building codes and SANS standards, and obtain required inspections. Using a reputable, insured contractor reduces the risk of non-compliant installations and costly corrections later.
What components are installed during this stage?
Common components include hot and cold supply lines, drain-waste-vent (DWV) systems, soil stacks, trench drains, sewer connections, pressure-reducing valves, isolation valves and outdoor taps. Materials often used are copper, PPR, PVC and HDPE depending on the application and local standards.
How do we plan pipe sizes and venting for our home?
Pipe sizing depends on fixture units, flow rates and fixture locations. A skilled plumber will calculate supply runs and DWV sizes, select appropriate vents and ensure adequate fall for drainage. Confirm plans in writing and ask for as-built drawings showing risers and concealed runs before walls close.
What inspection points are critical before closing walls?
Key checks include pressure testing supply lines, smoke or water testing the drainage and vent system, verifying fall and alignment, confirming pipe material and support spacing, and ensuring no penetrations compromise fire or structural elements. Municipal inspection sign-off is essential before plastering or boarding.
What should we check during an owner walk-through for rough-in work?
Check fixture locations, heights, and clearances; confirm that valves and clean-outs are accessible; verify pipe routing in ceilings and under slabs; look for visible leaks or unsealed penetrations; and get measurements or photos for future work. Ask the plumber to label supply lines and stacks for clarity.
What factors influence the cost of a rough-in quote in South Africa?
Costs depend on scope, materials (copper vs PPR vs PVC), labour rates, number of fixtures, access to work areas, slab or crawlspace work, site conditions, regional location and municipal approval fees. Complicated tie-ins, deep excavation or sewer connections increase price. Always request a detailed quote that separates labour, materials and permit costs.
How long does the rough-in stage typically take for a standard house?
For a single-storey, three-bedroom house the rough-in usually takes a few days to two weeks depending on crew size, site access and concurrent trades. Larger or complex projects take longer. Request a realistic timeline from contractors and build contingency days into your programme.
What common issues arise after a poor rough-in and how costly are fixes?
Typical problems are misaligned outlets, inadequate fall on drain lines, undersized pipes, hidden leaks and non-compliant venting. Fixes can range from small adjustments to opening walls or slabs, which significantly raises costs. Investing in quality workmanship and inspection reduces risk and long-term maintenance expense.
How do we ensure long-term reliability of the installed system?
Use approved materials and follow SANS and municipal codes; keep accessible shut-offs and clean-outs; ensure proper insulation on hot-water lines and frost-prone external pipes; schedule pressure tests and obtain municipal sign-off; and keep the contractor’s warranty and as-built drawings on file for future maintenance.
Can we get multiple quotes for our rough-in work and what should each include?
Yes. Request up to three written quotes, or up to five options where available, from independent contractors. Each quote should show labour hours, material list with brands, permit fees, inspection milestones, exclusions and payment terms. Compare these items rather than only the bottom-line price.
Ready to compare?