Surface Bed vs Suspended Slab
On the ground or in the air – two slabs, two jobs, two prices
Quick answer
Surface bed vs suspended slab – what each is, where each is used, and why the structural difference changes both price and programme.
20 min read
On this page
surface bed vs suspended slab in South Africa can change the price and lifespan of your project. Which option gives you the best value for money when budgeting a new home or renovation?
We help you weigh cost factors for concrete floors. Our platform explains how each choice affects labour, materials and long‑term durability. You will find clear pricing guidance at buildingpricessouthafrica.co.za.
Choosing the right floor system matters for structural strength and future maintenance. Plan with practical cost figures and confirm quotes in writing before you commit.
Use our guidance to compare options, understand how a slab type impacts your building and make a confident, cost‑aware decision for South African construction.
Understanding the surface bed vs suspended slab choice
A clear decision about your concrete element sets the tone for build quality and costs. A slab is a common cast component giving a flat surface used across homes and small commercial projects — the concrete slab costs guide prices both types.
One type rests directly on compacted ground and relies on the subsoil to carry loads, which is usually more economical; the suspended alternative shows up in double-storey building costs, where an upper floor needs support.
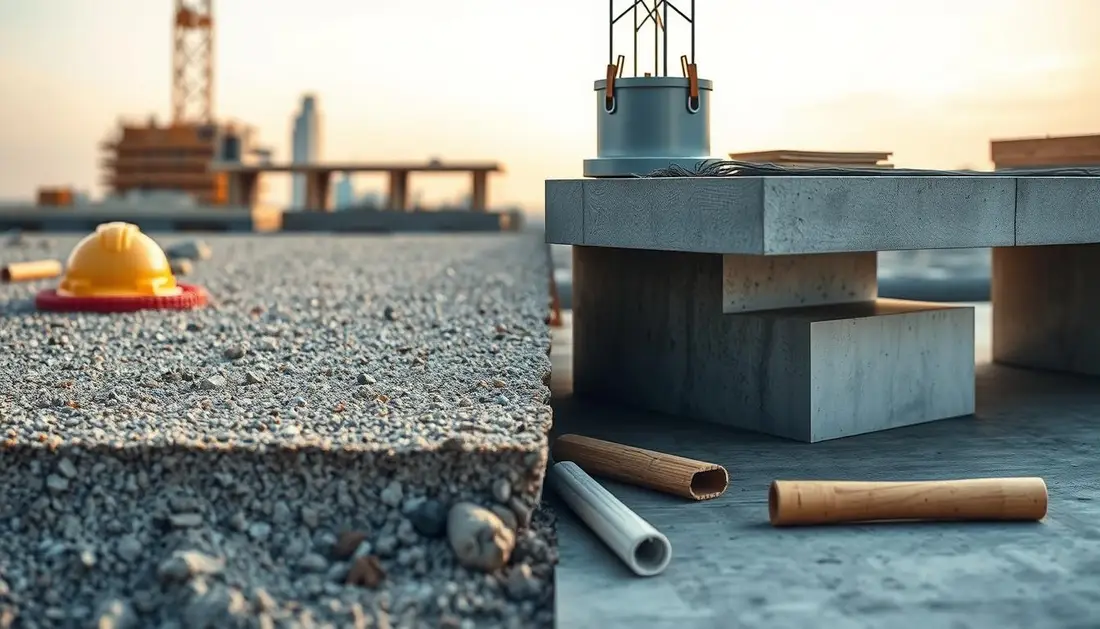
By contrast, a suspended slab is supported by beams or walls and does not touch the subsoil. This option suits upper storeys and locations where ground conditions are poor.
“Choosing the correct slab type early reduces repair risk and helps keep quotes accurate.”
Key considerations for your decision include site conditions, the intended use of the room, and the load the floor must carry. Proper planning ensures the concrete provides support for walls and other structural members above it.
- Cost impact: ground-bearing options often cost less in materials and labour.
- Performance: suspended designs offer flexibility where access or services run beneath the floor.
- Finish: the final surface depends on the materials you choose for flooring and damp-proofing.
Core definitions of floor structures
Choosing the correct floor type early shapes build cost, durability and the final internal level. In South African construction, two primary floor structures are common and both may used with either concrete or timber components.
Ground floors
Ground floors must be sound, durable and resist moisture to give you a reliable internal surface for daily use. Floor slabs at ground level support the weight of people and fittings and tie into the foundation and masonry walls.
Design matters: the chosen material, be it brick, concrete or timber, changes thermal resistance and costs. The aggregate and other products must meet local standards for safe construction.
Upper storey floors
Upper storey floors commonly use precast concrete slabs or timber joists depending on the structural plan. Masonry walls or beams usually carry these floors and ensure the internal level stays consistent through the building.
Regulations require the underside of timber floorboards to sit at least 550 mm above the ground below. Proper detailing prevents damp and maintains long‑term resistance to movement.
- Note: Whether you pick timber or concrete, correct materials and workmanship keep the structure stable and compliant.
Structural and engineering differences explained
A structural design decides how your floor transfers loads to foundations and keeps rooms level.
Ground-bearing concrete slab relies on compacted soil beneath to spread weight. It is simple to detail and usually costs less in materials and labour.
Spanning systems are engineered to bridge supports. These use steel reinforcement to resist bending and control deflection for upper floors or openings.

Reinforcement patterns matter: a one‑way system has moment‑resisting bars across its short axis. A two‑way design has reinforcement in both directions to share loads more evenly.
“Design calculations for bending moment and deflection keep floors level and safe over time.”
| System | Key feature | Best for |
|---|---|---|
| Ground-bearing | Load spread to compacted soil | Single-storey buildings, garages |
| Ribbed and waffle | Two‑direction strength; higher load rating | Large areas, long spans |
| Flat/corrugated | Simpler form, lower rating | Smaller rooms, lighter loads |
- Steel rebar prevents excessive bending in spanning floors.
- Walls and beams must be sized to take transferred loads.
- Understanding these rules helps you pick the right design for your building and budget.
Site preparation and ground conditions
A properly prepared site helps keep floors level and prevents future cracking. Before placing concrete, strip all topsoil, roots and organic matter. This ensures the base material will compact reliably.
Compaction and fill layers: apply any fill in layers no thicker than 150 mm after compaction. Use a mechanical compactor to consolidate hardcore such as crushed brick, granite or sand mixed with aggregate.

- Remove topsoil: clear organic material so the base will not settle.
- Layered fill: maximum 150 mm per compacted lift to achieve design density.
- Use mechanical compaction: it secures brick, sand or other materials under the floor.
- Depth rule: if fill exceeds 600 mm, consider a suspended solution for the building.
- Protect services: sleeve pipes and cables where they cross the slab to avoid future damage.
Careful assessment of soil conditions and base materials reduces long‑term risk and helps keep construction time and costs under control.
The role of damp proofing and moisture control
Correct detailing at junctions and penetrations is essential to stop water moving through a concrete floor. Effective moisture control starts with a continuous damp proof membrane (DPM) beneath the slab.
The DPM must be at least 1200g polythene and linked to the damp proof course (DPC) in the walls with a minimum 100mm overlap. DPCs should sit on a mortar bed and be lapped correctly at corners and junctions.
If no membrane is used, the floor must be set above DPC level to keep the building dry. Any service penetrations through the floor need sealing with concrete to preserve the barrier.
Ventilation matters: suspended floors require cross-flow air to prevent moisture build-up beneath timber or concrete elements.
- Choose flexible DPC material suitable for the expected movement and local conditions.
- Correct lapping and sealing prevent rising moisture that damages finishes and structure.
“Failing to control moisture leads to expensive repairs and poor internal finishes.”
Thermal performance and insulation properties
A concrete floor absorbs daily heat swings, smoothing temperature peaks inside the house.
Thermal mass benefits
Concrete has high thermal mass and responds slowly to ambient change.
This helps keep a building cool by day and warmer at night in climates with large daily swings.
The thermal conductivity of concrete typically ranges from 0.8 to 2.0 W m−1 K−1, and it changes with moisture, aggregate and mix proportions.
Insulation placement
Placement matters: insulation can sit above or below the concrete to improve energy efficiency.
Without adequate insulation, a concrete floor can drive heat loss through conduction, increasing running costs.
- Use rigid or PIR boards below slabs where ground contact is likely.
- For beam and block floors, EPS blocks reduce weight and improve thermal resistance.
- Consult an engineer to confirm the best insulation strategy for your building and level requirements.
| Issue | Typical effect | Recommended action |
|---|---|---|
| High thermal mass | Temperature buffering | Use with night cooling or thermal controls |
| High conductivity | Potential heat loss | Install continuous insulation layer |
| Moisture in concrete | Raises conductivity | Ensure DPM and proper drying before finishes |
“Match insulation location to ground conditions and intended use to get the best performance.”
Concrete specifications and curing requirements
A reliable pour depends on the right mix, clean base and disciplined curing routine.
According to SANS 10400, a concrete slab must reach at least 10 MPa compressive strength at 28 days. This minimum protects the structure and finishes you plan to fit. It reads well alongside concrete strength grades mpa.
The common site mix for a concrete floor is one part cement, four parts sand and five parts coarse aggregate by volume. For critical or spanning elements, ready‑mixed concrete is preferable to reduce risk.
- Curing: keep the surface moist for five to seven days; avoid laying foundation brickwork before this period.
- Placement: lightly vibrate and tamp the pour so no voids remain.
- Site checks: remove any water or debris from the DPM before placing concrete.
An engineer must specify thickness and reinforcement to suit design loads, beams and service routes. Follow their detail to ensure the floor supports walls, finishes and future use.
“Proper materials, workmanship and curing are the best insurance for long‑term durability.”
| Item | Minimum / Typical | Why it matters |
|---|---|---|
| Compressive strength | 10 MPa at 28 days | Meets SANS 10400 and ensures safe load capacity |
| Standard mix | 1:4:5 (cement:sand:aggregate) | Common for ground floors; predictable strength and workability |
| Curing time | 5–7 days moist cure | Prevents shrinkage cracks and achieves design strength |
| Placement method | Ready‑mix preferred; vibrate & tamp | Reduces voids and quality variation on site |
Reinforcement standards for suspended systems
Steel placement and cover determine how long a suspended concrete floor will last. Correct reinforcement controls tensile stresses, reduces cracking and keeps the floor level under load.
Fabric mesh grades
Use a ‘B’ mesh grade as standard for these floors. Primary bars should sit at 100mm centres and secondary bars at 200mm centres to give the intended strength.
The main reinforcing bars must have a minimum concrete cover of 40mm. This cover prevents corrosion and preserves the bond between steel and cement.
- Support the mesh: spacers are required to hold fabric at the correct level before pouring.
- Clean steel: reinforcement must be free from loose rust, oil or grease so the concrete bonds properly.
- Lap and detail: lapping of sheets must meet the specified minimums to keep continuity in the system.
- Engineer sign‑off: a qualified engineer must design reinforcement so beams and slabs meet regulatory strength and safety requirements.
Follow these standards and you reduce future repair risk and improve the long‑term performance of the suspended floor.
“Correct mesh grade, cover and clean steel give you the strength the design requires.”
Beam and block construction methods
Beam and block assemblies use pre‑stressed concrete beams and infill units to make a fast, repeatable floor system.
The method is common in South African residential and light industrial construction. You lay pre‑stressed beams on solid, level bearings and place hollow blocks between them.
Once in place, the gaps are grouted with a cement:sand slurry at a 1:6 mix. The poured grout ties beams and blocks into a single, strong surface.
Propping: the whole system is normally propped until the concrete reaches design strength. This usually takes about 21 days.
- Certification: choose products and installers with third‑party certification to meet safety and building standards.
- Load rules: do not build load‑bearing walls directly onto the beams; use proper foundations for walls.
- Services: route services through holes in the hollow blocks rather than cutting the structural beams.
This method gives good thermal and structural performance and often saves time on site. Always confirm design and bearing details with your engineer and get written confirmation before work starts.
“Beam and block systems are efficient where speed, repeatable quality and thermal benefits matter.”
When to choose a ground supported slab
Choose a ground-supported concrete option when your site is flat, the soil is stable and you need a cost-effective floor fast.
A ground-bearing slab suits single-storey homes and garages built on non-reactive soils with minimal slope. It reduces material and labour compared with deeper foundation systems and speeds up construction time.
Prepare the site carefully. Strip topsoil, place and compact fill in layers, and confirm design with your engineer so the slab stays level and resists settlement. Proper compaction and quality materials stop cracking later.
Insulation and damp proofing matter. You can place insulation above or below the concrete to improve thermal resistance. A continuous DPM is mandatory to prevent rising moisture into walls and finishes.
| Condition | Advantage | When to avoid |
|---|---|---|
| Flat, non-reactive soil | Lowest cost; quick install | Always suitable |
| Shallow foundation ( | Simple design; less steel | Not for deep footings |
| Good compaction | Stable level; less cracking | Poorly compacted fill |
| Low slope sites | Uniform finish; easy drainage | Steep slopes or reactive clay |
“Confirm soil classification and design with a qualified engineer before you pour.”
Managing clay soils and heave potential
Heave from clay threatens floors and walls unless the design includes a void or compressible layer. Reactive ground can expand with moisture and lift concrete, causing cracks and uneven level.
If foundation depth exceeds 1.5 m in clay areas, allow for heave in the design. Typically, a suspended floor system or a floor with a clear void is required so the building does not bear directly on reactive soil.
Use a compressible element or a proprietary void former beneath the underside of the floor. This lets the ground move without transferring stress to the floor or masonry walls.
“Proper site investigation and an engineer’s detail are the best defence against costly repairs.”
| Issue | Typical response | Why it matters |
|---|---|---|
| High heave potential | Clear void or compressible layer | Prevents uplift and cracking |
| Foundations >1.5 m | Design allowance for movement | Reduces stress on concrete and walls |
| Unknown soil | Full site investigation | Ensures correct system and cost estimate |
Always consult a structural engineer and confirm design and materials in writing before work starts. Ignoring clay risks can increase repair time and cost.
The impact of site access and region on costs
Remote or steep sites usually add hours, plant hire and transport, and those costs appear directly on your floor quote.
Access affects labour and equipment. If a crane, concrete pump or larger crew is needed, expect higher daily rates and longer time on site.
Regional price differences for concrete, steel and cement change budgets. In some areas ready-mix is pricier and delivery slots are limited.
Transport is significant for remote jobs. Longer hauls raise the cost per cubic metre and may require smaller, staged pours to suit access.
Complex designs or specialised beam systems need more engineer time and materials. That increases both labour and material components of the quote.
“Always budget for access, time and transport so your tender reflects real site conditions.”
Practical steps: clear the site, level access tracks, and get multiple quotes to compare regional labour and material rates.
| Cost driver | How it affects price | What to confirm |
|---|---|---|
| Site access | Raises plant hire and labour time | Crane/pump needs and access improvements |
| Region | Material and labour rate variance | Nearest ready-mix plant and local labour rates |
| Design complexity | More steel, formwork and engineer fees | Engineering scope, beams and reinforcement detail |
We recommend requesting multiple quotes so you can compare how access and regional factors change the total cost. Ask contractors to itemise transport, plant hire and materials in writing.
Inspection points for quality assurance
Spot checks at key stages protect your budget and ensure the floor performs as intended.
Regular inspections during construction keep workmanship and materials to the required standard. You should check the DPM is continuous and sealed at all service penetrations to avoid moisture entering the building.
Verify reinforcement mesh is correctly positioned and supported by spacers so the concrete achieves the intended strength. Confirm the concrete mix matches the engineer’s specification and that the cement content is correct.
Ensure the ground and compacted fill beneath the floor are level before pouring to reduce settlement risk. For beam and block systems, inspect that beams are level and blocks are properly grouted together.
Watch the curing process: keep the surface moist for the recommended period to prevent premature drying and cracking. Also check wall and timber junctions, insulation placement and final level prior to finishes.
- Document each check and ask contractors to sign off to protect your interests.
- We encourage you to keep records so the building meets safety and warranty requirements.
Essential documentation for building projects
Keep a complete project file so inspectors and future owners can verify what was built and why.
Maintain copies of structural designs and all engineer calculations for your floor and walls. These papers speed approvals and prove compliance with local building rules.
Record material specifications: concrete mix, cement content, reinforcement details and insulation placement. Written specs reduce disputes about the quality of work.
Log site preparation steps. Include compaction test results and DPM installation checks. For specialist systems, attach third‑party certification and test reports.
“Proper records protect your budget, shorten inspections and add value to the property.”
- Contract: keep a signed agreement that lists timelines, payments and warranties.
- Certifications: hold trade and product certificates for timber, insulation and other specialised work.
- Communication: save emails, change orders and site instructions from contractors.
| Document type | Why it matters | Where to store |
|---|---|---|
| Engineering drawings | Needed for inspections and rework | Project folder & digital copy |
| Material specs (concrete, cement, insulation) | Proves correct products used | Supplier invoices & site sheets |
| Compaction tests & DPM sign‑off | Verifies ground preparation quality | Site report and QA log |
Connecting with independent contractors for your project
Requesting multiple quotations helps you compare labour, materials and regional cost differences for your floor.
Our platform connects homeowners with independent contractors who specialise in ground and upper-level floor work. Visit buildingpricessouthafrica.co.za to request up to three quotes, or up to five where available, so you can compare pricing and scope.
Contractors carry out site visits, issue final quotes, manage timelines and provide warranties. Use our pricing guidance to check whether labour, materials, finishes, access and regional charges match the market.
We do not employ builders or manage construction work. Our role is impartial: we empower you with information so you can select the right contractor for your building needs.
| Service | What the contractor does | What you should confirm in writing |
|---|---|---|
| Site visit | Measure, check ground conditions and services | Scope, exclusions and access requirements |
| Final quote | Price for labour, materials, timber works and insulation | Payment terms and warranties |
| Project management | Schedule, quality checks and handover | Milestones, defect period and sign‑off |
Start today by requesting quotes and using our cost guidance. Comparing offers helps you secure fair value and a high-quality finish for your surface and floor investment.
Final considerations for your flooring investment
Your flooring decision shapes maintenance, thermal comfort and resale value for years.
Prices vary with scope, site conditions, materials, labour, finishes, access, region and contractor assessment. Confirm what is included and excluded so quotes are comparable.
Check and record timelines, payment terms and written warranties before work starts. A well‑built concrete slab gives a durable base and low maintenance over time.
Proper insulation and moisture control are essential for comfort and longevity of the floor, regardless of method chosen. Work with qualified professionals and get all details in writing to protect your investment.
FAQ
What is the main difference between a surface bed and a suspended slab?
A surface bed (ground-supported slab) sits directly on compacted fill and often includes a sand or aggregate layer, insulation and a damp-proof membrane. A suspended concrete slab is supported by beams, columns or load-bearing walls and leaves a void beneath the floor. The suspended option is suited to upper storeys or sites with poor ground conditions or high heave risk.
Which option is better for a single-storey house on good ground?
For a single-storey dwelling on well-compacted, stable ground, a ground-supported slab usually costs less and requires less structural steel or deep beams. It offers good thermal mass and is quicker to build. Confirm soil compaction, DPM placement and edge insulation with your engineer and contractor before signing a quote.
How do ground floors differ from upper storey floors in design?
Ground floors are typically ground-supported slabs with layers for sub-base, DPM, insulation and screed. Upper storey floors are usually suspended systems: cast-in-place concrete on beams, precast planks, or composite steel-deck systems. Each requires different reinforcement, deflection checks and acoustic or fire ratings.
What site preparation is needed for a ground-supported concrete floor?
Site prep includes clearing topsoil, achieving proper subgrade compaction, placing a layer of crushed stone or coarse aggregate, and installing a vapour-proof membrane. You may also need edge insulation and a blinding layer. Proper compaction and drainage reduce the risk of settlement and cracking.
How important is compaction and what layers are used under the slab?
Compaction is critical. Typical layers are: trimmed subgrade, compacted fill or selected fill, a layer of coarse aggregate or crusher-run, a sand blinding coat, then the DPM. Each layer needs compaction to specified densities; your engineer or geotechnical report will specify requirements.
What damp-proofing or moisture control measures are required?
Install a quality DPM beneath the slab and seal around services. Use tanking or cavity barriers for walls where needed. For suspended floors, ensure membranes at junctions and adequate ventilation of underfloor voids. Confirm product compatibility with adhesives and finishes.
How does thermal performance compare between the two systems?
Ground-supported slabs offer high thermal mass, which stabilises internal temperatures but needs edge insulation to stop heat loss. Suspended slabs require insulation within the floor build-up or ceiling below to meet energy targets. Insulation placement affects cost and floor finish choices.
Where is insulation placed in each floor type?
For ground-supported slabs, place rigid insulation beneath the slab or at the edges (edge insulation) to reduce heat loss. In suspended systems, insulation can be between beams, above the slab as an overlay, or beneath the floor in the ceiling cavity. Choose insulation to suit moisture and load conditions.
What concrete mix and curing practices are needed for floor slabs?
Use a concrete mix specified by your structural engineer—commonly C25/30 or as required for strength and exposure. Cure the slab with wet curing, curing compounds or polythene sheeting to prevent rapid drying. Follow recommended curing times before loading or applying finishes.
What reinforcement standards apply to suspended concrete systems?
Suspended slabs require designed reinforcement: main bars, distribution mesh and possibly shear links or beams. Reinforcement must meet SANS or engineer specifications, including bar grades and cover. Fabric mesh grades and placement are specified on structural drawings.
Which fabric mesh grades are commonly used in floor slabs?
Common welded wire fabric grades include A142 and A252 (refer to local SANS equivalents). Your engineer will specify mesh size and grade according to slab thickness, loading and crack control needs. Ensure correct cover to protect against corrosion.
How does beam and block construction compare to cast suspended slabs?
Beam-and-block (or precast plank) systems speed up construction and reduce on-site concrete. They are suitable for medium spans and provide good thermal separation between floors. Cast-in-place suspended slabs offer monolithic continuity and precise reinforcement placement but take longer and need formwork and propping.
When is a ground-supported slab the right choice?
Choose a ground-supported slab when ground conditions are stable, access is good, and you want lower initial cost and fast construction. It suits single-storey homes, garages and slabs-on-grade. Confirm soil tests and drainage design to avoid future settlement problems.
How do clay soils and heave risk affect the decision?
Expansive clay can heave with moisture changes, risking slab movement. In high-heave areas, suspended slabs or deep strip foundations with movement joints may be safer. A geotechnical report will show soil classification and recommend footing depth, moisture control and mitigation strategies. This pairs naturally with how soil conditions affect foundations.
How does site access and region influence cost estimates?
Remote sites, steep access or limited crane space increase labour time, plant costs and material delivery charges. Region affects labour rates and material availability. Always confirm access, transport and any required approvals in writing; these factors influence final quotes.
What inspection points should I check for quality assurance?
Key checks: subgrade compaction certificates, correct DPM installation, reinforcement placement and cover, concrete mix and curing records, beam formwork and propping, and finishing tolerances. Request inspections and sign-offs at each critical stage.
What documentation should I request before work starts?
Ask for the structural engineer’s drawings and specifications, geotechnical report, SANS compliance notes, contractor’s quote with scope, material warranties, and proof of liability insurance. Get timelines and payment milestones in writing.
How do I connect with independent contractors and get quotes?
Provide your plans, soil report and site access notes when requesting quotes. We recommend requesting up to 3 independent quotes, or up to 5 where available. Compare scope, exclusions, timelines and warranties rather than price alone.
What final considerations affect the lifetime cost of your floor?
Consider maintenance, insulation performance, moisture control, and the cost of future repairs. A slightly higher-quality slab or better waterproofing often saves money long-term. Confirm guarantees, ask about expected maintenance, and ensure the contractor provides a clear defects period.
Ready to compare?