
Wiring for Inverters and Solar
Dedicated circuits, changeovers and COCs – wiring the backup properly
Quick answer
Wiring for inverters and solar – essential-load circuits, changeover switches and the COC implications – done right the first time.
12 min read
On this page
Curious which choices stop power failures and protect your home investment? This short introduction sets out practical steps to plan a safe inverter installation and a reliable system that lasts.
Our platform and buildingpricessouthafrica.co.za give clear pricing guidance so you can budget before you begin.
Proper wiring is the backbone of any power system. It prevents hazards and extends equipment life.
Use this guide to understand the key cost drivers, what a typical installation looks like, and which checks to ask contractors to confirm in writing.
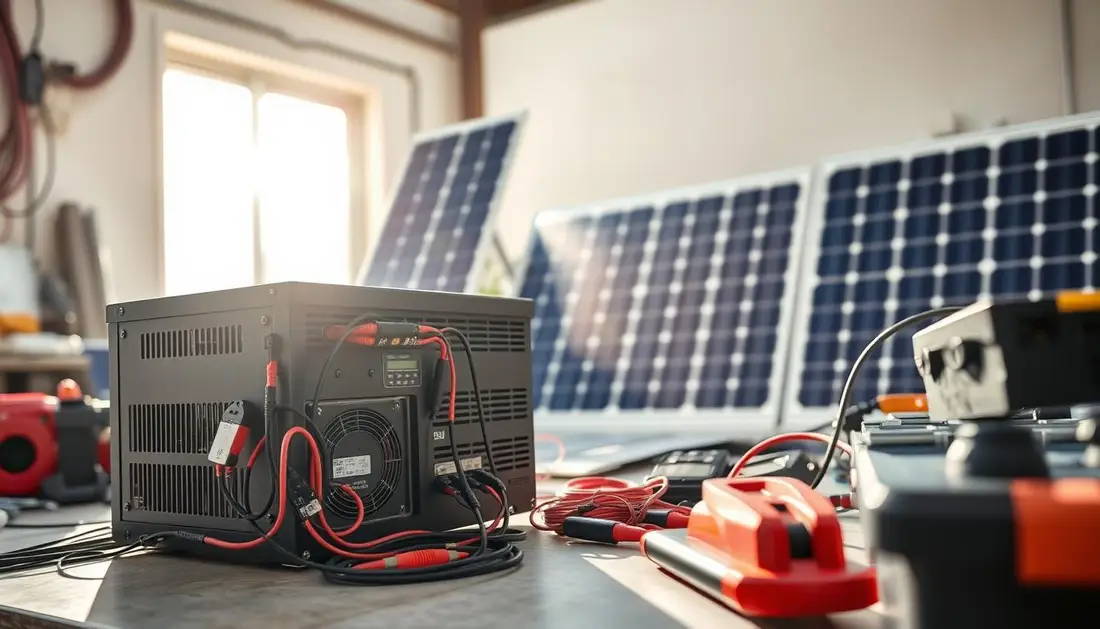
We help you compare quotes and make informed choices, so your project stays on budget and meets local South African standards.
Understanding Inverter Wiring Requirements for South African Homes
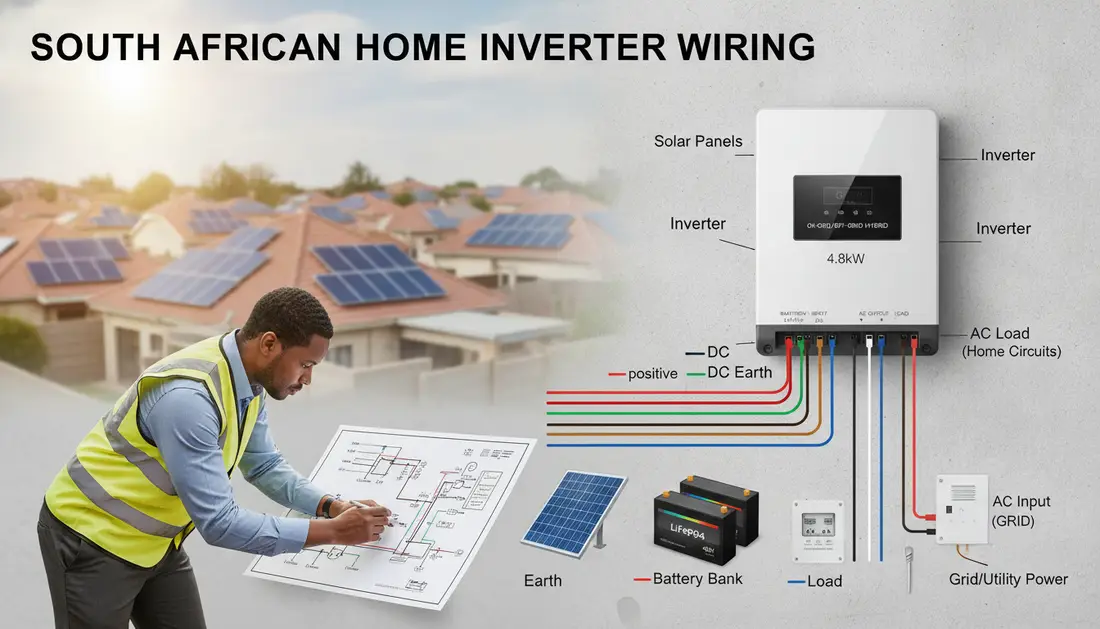
Start by picturing how the battery, panel and distribution board talk to one another. This simple map is the best way to see what each part does in your home power system.
Key components are the solar panel array, the battery bank, the main distribution panel and the changeover or transfer switch. Each must have a safe connection and correct earthing to protect people and property.
Professional installation makes sure the inverter integrates with your existing circuits and that essential loads are split correctly. That reduces the risk of voltage drops and keeps critical circuits running during load-shedding.
- Essential-load split — choose which sockets and appliances stay live.
- Changeover switch — automates the shift between grid and backup.
- Earthing — prevents faults and protects your distribution board.
Our platform helps you check the technical anatomy of your system and confirms that every connection meets South African safety standards. Knowing these basics makes it easier to manage quotes and oversee the installation service.
Assessing Your Power Needs and Essential Loads
Estimate your household’s true power demand before you choose equipment or contractors. A short, clear plan helps you pick the right battery and panel options and keeps costs predictable.
Planning your essential-load split
Start room by room. List lighting, fridge, security, and any medical devices you need during outages. Mark items that must run continuously.
- Identify critical sockets and circuits.
- Include startup surge for motor-driven appliances.
- Decide which panels feed essential circuits.

Calculating total wattage requirements
Sum the running wattage of each appliance and add surge allowances. This total tells you the system size and the battery bank capacity you need.
| Item | Running (W) | Surge (W) | Notes |
|---|---|---|---|
| Refrigerator | 150–300 | 800–1200 | Motor startup surge |
| LED lighting | 50–150 | 50–150 | Low steady draw |
| Router + security | 20–50 | 20–50 | Essential for remote access |
| Totals | 220–500 | 870–1400 | Use for sizing battery and inverter |
“Size for continuous load first, then confirm surge capacity.”
Checklist: list essential devices, record running and surge wattage, pick battery type, confirm voltage and expected autonomy. Our platform helps you compare costs and choose the right size for your home.
Critical Safety Standards and Compliance Implications
A valid safety certificate saves you money and stops unsafe DIY work from becoming a legal headache. The Certificate of Compliance (COC) is not optional for any inverter installation. It proves your system meets national electrical codes and shows inspectors and insurers the job was done correctly. This pairs naturally with electrical compliance certificate.
DIY connections often miss key checks. That can cause backfeeding, overloaded circuits or fires — and insurers may refuse a claim after non-compliant work.
Have a certified electrician verify every wire and breaker. They confirm the voltage and current match the battery and panel setup. This reduces risk and protects household power continuity.

- COC mandatory: proves compliance with codes and local standards.
- Professional checks: ensure correct wire gauge, breakers and earthing.
- Design safety: system must handle expected voltage and loads long term.
“A documented COC avoids costly disputes and keeps your home safe.”
Our platform connects you with certified professionals who prioritise compliance and supply a full COC on completion.
Anatomy of a Secure Inverter Installation
Good practice begins by mapping each AC and DC input to its dedicated route. That simple step keeps circuits clear and helps you connect inverter equipment safely.
System earthing protocols
Robust earthing protects the property from surges and lightning. Use solid earth points and bond the panel enclosure to the main earth bar.
Use copper conductors rated to at least 150V, 75°C. Confirm the earth connection at every breaker and shunt.
Managing AC and DC inputs
Keep AC and DC inputs in separate conduits to avoid interference. The VE Panel handles both AC and DC but never mix types in one conduit.
The VE Panel ships with 4/0 cable for critical inverter connections and a standard 50mV/500A shunt for monitoring current.

Inverter bypass switch configurations
The bypass switch uses a mechanical slide assembly to ensure both breakers cannot be ON at once. That lets you isolate the inverter for service while preserving essential loads via changeover.
- Fit correct gauge cable between the battery bank and charger to avoid voltage drop.
- Label every breaker and connection for quick fault finding.
“A clear layout and quality copper cables keep system performance predictable.”
Managing Property Risks and Circuit Overloads
Protect your property by spotting common installation shortcuts that risk backfeed or overload.
Backfeeding the grid is a severe hazard. It can endanger utility workers and damage your home electrical system. Always ensure the contractor isolates the inverter output from the mains during faults and service.
Overloaded circuits often start with poor distribution planning. Confirm your distribution board can accept the extra power and that breakers match the expected loads.
Do not attempt DIY approaches that bypass safety devices. Bypassing fuses or a breaker can lead to catastrophic failures and invalidated insurance.
- Site assessment: pay for a professional check before work starts.
- Capacity check: make sure existing circuits can handle added loads.
- Isolation: design the system so output is safely separated from the grid.
“A formal site assessment prevents shortcuts and keeps appliances and devices safe.”
| Risk | Likely cause | Consequence | Mitigation |
|---|---|---|---|
| Backfeed | Incorrect changeover or bypass | Harm to utility staff, equipment damage | Lockable changeover, verified isolation |
| Overloaded circuit | Poor distribution, undersized breaker | Tripped breakers, fire risk | Load study, correct breaker sizing |
| Voltage fluctuation | Poor system design or panel mismatch | Damaged appliances | Surge protection, correct panel match |
| Bypassed safety | DIY or shortcuts | Catastrophic failure, voided insurance | Use certified contractors, insist on written checks |
Selecting Appropriate Cables and Hardware
Correct copper conductors stop voltage drop and keep your system reliable.
Choose cable size to match the load and the distance. For a 2000W inverter run at 12V use 2/0 AWG up to 3 ft and 4/0 AWG up to 10 ft. The VE Panel ships with 6AWG for all AC circuits.
Copper wire ratings and torque specifications
Use high-quality copper cable rated to 75°C and marine-grade for battery runs. NEC-style codes require DC conductors sized to at least 125% of the inverter’s max current.
- Crimped and sealed copper compression lugs with a 3/8“ hole for battery cables.
- Follow torque specs on every terminal and breaker to avoid loose connections and arcing.
- Use UV-resistant cable and the correct charge controller for solar panels input.
| Run | Recommended AWG | Notes |
|---|---|---|
| 2000W, 12V, ≤3 ft | 2/0 AWG | Low voltage drop for short runs |
| 2000W, 12V, ≤10 ft | 4/0 AWG | Longer run, higher current |
| VE Panel AC circuits | 6 AWG | Factory wired for AC output |
“Confirm all material specs in writing with your contractor to ensure correct type and size.”
We help you review cable lists and hardware so you get quoted accurately and avoid costly changes on site.
Professional Guidance for Your Solar Project
Before committing, compare professional quotes so you know exactly what is included and what is not.
We connect you with independent contractors who provide site-specific pricing, not generic estimates. A visit lets them size panels and the battery bank to your home and confirm realistic timelines.
Always ask for a written agreement that lists inclusions, exclusions, payment milestones and equipment warranties. That written record protects you and speeds up any service or claim.
- Compare quotes: request up to three quotes where available to see price and labour differences.
- Confirm scope: which fittings, labour and testing are included; what is excluded.
- Agree timelines & payments: staged payments tied to milestones reduce risk.
A qualified contractor will handle complex connections for the inverter and ensure the system is commissioned to safety standards. Use our price guidance and quote comparison to choose a reliable service that fits your budget and gives long‑term peace of mind.
“Get the scope, timeline and warranty in writing before work starts.”
Ensuring Long-Term System Reliability
A simple maintenance routine dramatically extends the life of your battery bank and panels.
Check your battery health, top-up or equalise cells as the manufacturer advises and keep voltage within the recommended range. Inspect terminals and connections for tightness and corrosion; loose copper lugs cause big power losses.
Wipe panels clear of dust and debris to maximise output and help the charge controller work efficiently. Verify cable size and AWG matches the installation and confirm breakers, distribution and switch points still meet the load and wattage you use. It reads well alongside plug points per room.
We recommend a professional service every two years to confirm compliance with local codes and to test overall system performance. Quality components and regular checks keep your home powered and resilient.
Set your budget using electrical costs and db board upgrade.
FAQ
What is the correct way to size the battery bank for a household backup system?
Start by listing the essential loads you want to run during outages — lights, fridge, router, a few plugs. Calculate the total watt-hours per day, factor in depth-of-discharge (DoD) and desired days of autonomy, then choose a battery bank with the needed amp‑hours at your system voltage. For example, a 24 V bank sized to deliver 4 kWh usable with 50% DoD requires around 333 Ah. Always allow for inverter efficiency losses and have a qualified electrician confirm cable and breaker sizes.
How do I plan the essential-load split for my home?
Group circuits by priority: lighting and security first, then refrigeration and communications, then sockets for crucial appliances. Use a dedicated distribution board or critical-load sub-board fed from the backup system so only selected circuits run during power cuts. Label the circuits clearly and ensure the transfer switch or bypass isolates mains to prevent backfeed to the municipal network.
How do I calculate total wattage requirements before choosing components?
List each device, note its running watts and starting surge where applicable (motors and compressors), then add a safety margin of 20–30%. Multiply running watts by expected hours of use to get daily watt-hours. This informs battery capacity, charge-controller sizing and the continuous power rating needed for the power-conversion unit.
What statutory safety standards must I comply with in South Africa?
Installations must meet SANS 10142 for electrical wiring and SANS 10106 or relevant SANS standards for renewable-energy systems. Local municipal bylaws and the National Regulator for Compulsory Specifications may also apply. Use SABS‑approved components and have the final installation inspected and certificated by an accredited electrician. For what this typically costs, see budgeting for electrical installation.
Why is a Certificate of Compliance (CoC) necessary?
A CoC confirms the installation meets statutory safety standards and is required for legal resale, insurance and some municipal connections. It also protects occupants by verifying correct earthing, protective device coordination and safe connection to the household distribution board.
What earthing protocols are best practice for a solar-backed system?
Bond the DC and AC earthing systems per SANS recommendations, use an earthing busbar and connect to a dedicated earth electrode with low resistance. Maintain separation between neutral and earth where the system interfaces with the municipal supply. Have an electrician test earth-loop impedance and produce test results for the CoC.
How should AC and DC inputs be managed to avoid faults and interference?
Keep DC and AC cabling physically separated and use appropriately rated isolators and fuses on both DC strings and AC outputs. Fit surge protection devices on the AC distribution and on the DC side if recommended by the manufacturer. Ensure polarity is correct on DC connections and that AC neutral/earth bonding follows local regulations.
Do I need a bypass or changeover switch, and what type is recommended?
Yes — a transfer switch or manual bypass isolates the backup system from the grid during outages and prevents backfeed. Automatic changeover switches provide seamless transition but cost more; manual bypasses are cheaper and simpler to service. Choose a unit rated for the continuous load and consult an electrician for correct installation and interlocking.
How do I prevent circuit overloads and manage property risk?
Use correctly rated breakers and fuses sized to match cable capacity and device ratings. Distribute loads across multiple circuits to avoid single‑circuit overloads. Install residual current devices (RCDs) and ensure the battery management system limits charging currents. Regular inspections reduce fire and shock risk.
What cable types and sizes are suitable for DC and AC runs?
Use stranded copper conductors with insulation rated for the system voltage and environment. For DC battery-to-converter runs, choose low-voltage, large‑cross‑section cables (e.g. large AWG or mm²) to limit voltage drop — commonly 35–120 mm² copper for higher currents. For AC outputs inside the home, standard ring or radial wiring as per SANS and appropriate mm² sizes apply. Tighten terminals to manufacturer torque values.
How do copper wire ratings and torque specifications affect safety?
Correct conductor size prevents overheating; each cable has an ampacity rating that must exceed expected continuous current. Over‑ or under‑tightened terminals can cause high resistance joints and arcing. Follow the equipment manual for torque values and have an electrician verify connections with a calibrated torque wrench.
When should I call a professional and what will they check?
Engage a registered electrician for design approval, cable sizing, earthing, protective-device coordination and the final Certificate of Compliance. They will confirm space and ventilation for batteries, correct isolation, conduit routing, cable terminations, changeover configuration and municipal interconnection requirements.
How can I ensure long-term reliability and performance?
Implement routine maintenance: check battery state‑of‑charge, clean terminals, verify torque on connections, test RCDs and inspect for corrosion. Keep an eye on battery temperature and charge-controller settings. Record service dates and performance metrics so you can spot degradation early and budget for replacement parts.
What factors drive the overall cost for a typical 3–5 kW household system in South Africa?
Cost depends on battery chemistry (lead‑acid vs lithium), usable capacity, power‑conversion unit size, panel and charge‑controller quality, cabling and protective devices, labour and approvals. Expect a wide range; request up to 3 independent quotes from reputable installers and compare component lists, warranties and test certificates before committing.
Ready to compare?