
Roof Tie-Ins: Joining New Roofs to Old
Joining new roof to old – flashings, levels and leak points that decide extension quality
Quick answer
Roof tie-ins explained – how new roofs join old ones, the flashing and level details that leak first, and what good work looks like.
20 min read
On this page
roof tie in extension projects in South Africa carry a clear cost and risk profile. At buildingpricessouthafrica.co.za we show the likely costs and material choices so you can plan with confidence.
Joining a new covering to an older structure demands careful design, correct pitch alignment and compatible roofing materials. The apex of a truss must meet the new top line precisely to avoid movement and water ingress.

Our platform guides you through site factors that affect price: access, labour, timber or steel trusses, battens, membrane layers, insulation and specialised tiles or slates. We explain how drainage and ventilation influence the final figure.
You might ask: can a mismatched pitch or wrong material cause long-term damage? The short answer is yes — and that is why consulting a qualified specialist before work starts is strictly necessary.
Understanding the Roof Tie In Extension Process
Integrating a new span with an existing structure requires careful sequencing and correct structural alignment. We explain the key steps so you can plan time, labour and material costs with fewer surprises.
Key components: trusses are a rigid framework of timber or steel members that bridge the span. The bottom chord (also called the tie-beam) transfers load to supporting walls.
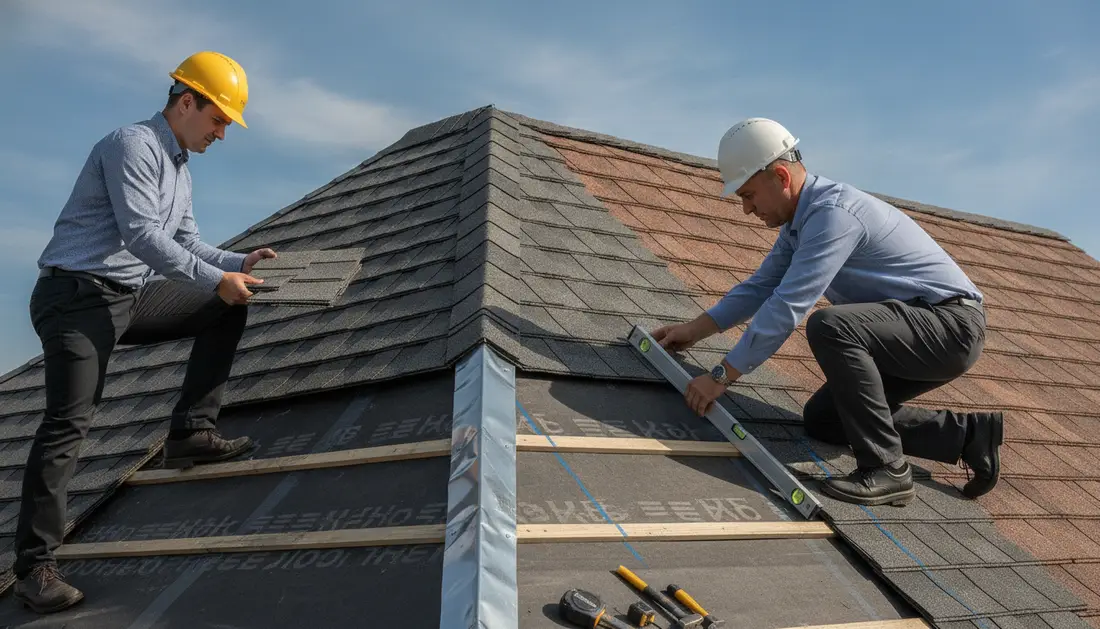
A timber frame often supports the new roof covering and battens, while membranes and underlays assist with waterproofing below tiles or slates. Different types of trusses, including girder trusses, may be necessary to support heavier structures.
- For flat roof work, insulation must be laid on top of decking to meet regulations.
- Valleys and hips need careful detailing so drainage handles storm water without pooling.
- Use quality materials and matching pitch to avoid awkward junctions.
| Element | Common Material | Function |
|---|---|---|
| Trusses | Timber / Steel | Support span; distribute loads |
| Membrane | Synthetic underlay | Secondary waterproof layer |
| Insulation | Rigid board / PIR | Thermal compliance and condensation control |
Why Professional Guidance Matters for Your Project
You need expert assessment to confirm truss capacity, wall plate condition and the correct fixings for a secure junction. A qualified assessor will calculate loads and check whether timber or steel members meet the required standard.
Structural checks matter: incorrect trusses or a compromised wall plate can cause movement and water ingress. Professionals make sure hurricane clips and purlins are fitted to deliver the necessary stability.

Insulation and vapour control are part of the same brief. Proper insulation, a correctly installed membrane and vapour barrier prevent condensation and protect timber from decay.
- Experts size trusses and specify battens so the roof covering stays secure over time.
- They assess drainage and existing structures to avoid costly surprises on site.
- Our pricing guidance explains why specialist skills affect cost and how to compare quotes.
“Professional assessment is strictly necessary to make sure the roofing system is designed to last.”
| Item | Why it matters | Typical check |
|---|---|---|
| Trusses | Support loads and resist weather | Load calculation, connector checks |
| Insulation | Controls heat and moisture | Type, thickness and vapour barrier |
| Fixings | Keep tiles and battens secure | Hurricane clips, screws and flashings |
Essential Factors Influencing Your Roof Tie In Extension Costs
Costs depend on clear, practical factors: access to the property, the materials you choose and the complexity of the design.

Site Access and Complexity
Hard-to-reach areas increase delivery time and handling for timber and steel. That drives labour hours and plant hire costs.
Complex junctions and a steep pitch add time and require more skilled installers. More junctions mean higher labour totals.
Material and Labour Variations
Choice of roof covering, such as tiles or slates, changes material cost and installation time. Premium tiles raise the initial outlay but can last longer.
Contractor assessment is strictly necessary. They will confirm if additional support or altered trusses are required.
Pricing checklist
- Confirm inclusions and removals in writing.
- Check region-specific labour rates.
- Ask whether insulation, battens and membrane are included.
| Element | Impact on cost | Common concern |
|---|---|---|
| Site access | High if cranes or longer handling needed | Delivery delays, extra labour |
| Materials | Tiles and timber affect material spend | Availability and lead times |
| Labour & design | Skilled labour for complex systems raises price | Correct truss sizing and waterproofing |
Mechanics Behind Tie In Pricing
When two different roofing systems meet, the cost per metre rises because custom work is needed. You pay for precision: carpenters and metalworkers must cut timber and steel to match an existing structure exactly.
The labour is more skilled and more time-consuming than a new roof. Installers fit flashings carefully so water cannot find a way through the junction.
Existing structures often need modification. That adds to site time and can require extra battens, membrane and underlay to get a seamless finish.
- Tie-in metres cost more since trusses and new members must join an older section with tight tolerances.
- Custom cutting of timber and steel increases labour time and the total materials used.
- More flashing, underlay and battens are normally required to guarantee a watertight seal.
- Skilled labour time and careful design are the main drivers of the higher per-metre price.
“You are paying for the risk management and expertise needed to protect the rest of your home.”

Common Methods for Joining New Roofs to Old
Different junction types solve level, pitch and material mismatches while protecting the rest of the building.
Extended plane junctions are used when the new pitch matches the existing pitch. This keeps the same plane and needs matching trusses, battens and roof covering for a neat finish.
Box gutters manage water where two sections meet at different levels. They require galvanised steel or lead-lined troughs, correct fall and regular inspection to avoid blockages and water damage.
Stepped junctions are common when joining a new span to an existing wall or differing height. They need careful flashing, membrane overlap and often added insulation to prevent cold spots and leaks.
- Each method needs specific materials and skilled labour; choice affects total cost.
- Proper flashing and membrane detail are essential to stop water ingress.
- We recommend a professional site assessment to select the right system for your home and structure.
“Correct design and installation protect the rest of the building and reduce later maintenance costs.”
Extended Plane Junctions Explained
When two matching pitches meet, extending the existing rafters keeps the line continuous and reduces custom carpentry.
What this method does: it continues the current roof line across the new span so the whole building looks uniform. The new rafters must line up precisely with the old rafters for a neat finish.
It is often the most cost-effective approach when pitches are identical. Less bespoke cutting of timber and fewer bespoke trusses lowers labour and material time.
Key installation points: fit a high-quality underlay and membrane to keep the junction watertight under heavy rain. Match battens spacing to support the chosen tiles or roof covering.
Our pricing guidance notes that even this simpler system needs precise design and hands-on carpentry. On site, check that insulation, battens and flashings are included in quotes to avoid extra costs later.
“A matched slope gives a clean finish but must be executed precisely to prevent water and movement issues.”
- Best where existing pitch equals new pitch.
- Requires accurate alignment of rafters and battens.
- Use quality underlay, membrane and correct insulation.
Box Gutter Applications
A correctly graded box gutter is the practical solution for managing concentrated water flow at complex junctions.
Box gutters collect large volumes of water where a new span meets an older line at a lower level. They are usually formed from galvanised steel or similar durable material to resist corrosion.
Good design ensures a clear fall so water does not pool at the junction. Proper membrane detail and sealing around the box is essential to keep the building watertight.
Cost factors: professional installation, correct slope, and material quality. Ask your builder about the proposed design and the membrane system to be used. Confirm whether insulation and battens are included in the quote.
- Box gutters handle heavy water flow between differing planes.
- Durable steel construction and correct pitch prevent leaks and damage.
- Regular maintenance stops debris build-up and overflow problems.
| Component | Typical material | Why it matters |
|---|---|---|
| Gutter trough | Galvanised steel | Carries concentrated water and resists corrosion |
| Membrane | Synthetic waterproof layer | Seals junctions and prevents leaks |
| Fall & outlet | Designed to spec | Prevents pooling and protects structure |
Stepped Junction Techniques
Stepped junctions form a laddered waterproof detail where a sloping surface meets a vertical wall or chimney. This method uses overlapping flashing to create a series of steps that shed water away from the abutment.
The steps must follow the slope closely so each flashing lap directs water down and away. When fitted correctly, this detail prevents water ingress at difficult roof-to-wall connections.
Quality workmanship shows in neat, even steps and durable flashing material. Installers often combine membrane and metal flashings to protect the building fabric and to work with battens, tiles and the chosen roof covering.
- Stepped junctions join a new slope to vertical walls or chimneys and are vital for long-term durability.
- Overlapping flashings shed water in stages; correct alignment with the pitch is essential.
- Our pricing guidance notes this is a specialist task — expect higher labour for careful cutting, fitting and sealing.
“A well-executed stepped junction is one of the clearest signs of professional roofing and guarantees better protection against water.”
On site, verify the flashing material and check the membrane and insulation details. Proper execution here reduces future repairs and protects the rest of the building.
Identifying Potential Failure Points
Small defects at junctions are the usual cause of long-term leaks and avoidable repair bills. Spotting these early keeps costs down and protects insulation and timber from rot.
Flashing Shortcuts
Flashing shortcuts commonly appear when a contractor uses sealant instead of formed metal flashing at junctions. That quick fix fails under UV and movement.
Proof spec: request a photo showing the proposed flashing detail, the fixing method and the membrane overlap before work starts.
- Sealant-only junctions often leak after seasonal movement.
- Correct metal flashing sits over the membrane and under battens for a durable seal.
- Ask to see samples or prior work photos for similar material and design.
Level Mismatches
Level mismatches between the new and old span create pooling points where water collects and penetrates the structure. Even small steps change flow and stress the underlay.
Valley debris traps worsen the issue when valleys are too narrow or lack correct fall. Regular cleaning helps, but correct design matters more.
| Failure point | Likely cause | Action to demand |
|---|---|---|
| Flashing shortcuts | Sealant instead of metal flashing | Show metal detail, membrane overlap, fixing method |
| Level mismatch | Incorrect alignment of planes | Survey and adjust trusses or battens; confirm fall |
| Valley debris trap | Narrow valley or poor slope | Widen valley, design correct fall, plan maintenance |
“Inspect junction details and ask your builder to explain how they will prevent pooling and protect insulation and timber.”
Visual Signs of Poor Workmanship
Small visual clues on the roof usually point to larger installation issues beneath the surface. Spotting these early saves money and protects insulation, timber and other fabric from hidden damage. It reads well alongside storm damage roof insurance claim.
Valley Debris Traps
Debris lodged in a valley is more than an eyesore. It shows the design does not allow natural clearing and that water will pond, stressing the underlay and timbers below.
Uneven lines or sagging sections signal misaligned trusses or undersized timber members. These are clear visual warnings you should not ignore.
Gaps in flashing or mortar indicate poor detailing and a high risk of water ingress. Poorly fitted tiles that do not sit flush are another telltale sign of rushed labour.
Our pricing guidance urges you to look for these signs during a site visit and to ask the builder to explain the proposed remedial work and material standards.
- Check valleys for trapped leaves and debris.
- Look along ridges for uneven lines or sagging.
- Inspect flashings and tiles for gaps or poor fit.
“Address workmanship concerns immediately — small defects become costly repairs.”
Structural Integrity and Load Bearing Requirements
Structural safety begins with accurate load calculations and verified member capacities for every new junction.
The weight of the covering, underlay, insulation and any weather load must be calculated before work starts. Trusses must be specified to carry those loads without excessive deflection or movement.
Load-bearing walls need inspection to confirm they can accept the added weight without cracking or shifting. If walls are marginal, additional supports or foundations may be required.
Proper bracing prevents buckling of compression members. Purlins, spars and collar ties must be sized by an engineer so the whole system resists wind and rain loads.
Never scrimp on structural elements. Ask your builder for signed structural calculations and a list of proposed materials, including timber, battens and insulation. This protects your family and investment.
“Request proof of structural calculations before any work begins.”
- Confirm trusses are engineered for local weather loads.
- Check that battens and tiles suit the specified member spacing.
- Include the material and labour scope in writing to avoid surprises.
Ventilation and Moisture Control
Proper airflow through the attic space stops damp and protects timber from decay. Adequate ventilation at the eaves reduces condensation buildup and keeps the whole system dry.
Moisture control is essential to prevent mould growth and structural rot. If you leave vapour to move unchecked, insulation loses effectiveness and sheeted spans develop cold spots.
Insulation must be correctly installed to prevent heat loss and control condensation. Pay attention to gaps, compressed insulation and correct placement near battens and tiles so the system performs as specified.
Vapour barriers add protection by slowing the passage of water vapour through building components. They belong on the warm side of the insulation and must be continuous to be effective.
- Adequate eaves ventilation prevents condensation buildup and damp issues.
- Correct insulation installation preserves thermal performance and reduces mould risk.
- Vapour barriers should be specified and installed by your contractor.
- Our pricing guidance notes ventilation is often overlooked but critical for long-term health and lower maintenance costs.
“Ensure your builder includes ventilation details and vapour control in the written scope; it protects timber and reduces future repairs.”
Essential Questions for Your Builder
Before you sign, make sure the contractor explains how the new junction will protect your home from water and movement. Ask for a clear description of the method and the materials to be used.
Key questions to ask on site:
- How will you join the new section to the existing structure to ensure a watertight seal?
- What specific type of flashing will you use at the junction and who supplies it?
- Can you show examples of similar projects you have completed, with photos or references?
- Please provide a detailed breakdown of materials and labour in the quote, including battens, tiles and timber where applicable.
- How will you manage ventilation and moisture control around the junction and what insulation will be installed?
- How will you match the pitch and covering so lines and weatherproofing remain continuous?
- What warranties cover materials and workmanship, and do you follow local building regulations?
| Confirmation | Ask for | Why it matters |
|---|---|---|
| Materials | List & suppliers (timber, battens, tiles) | Avoids later substitution |
| Ventilation | Plan & insulation spec | Prevents condensation and rot |
| Experience | Project examples & references | Shows capability with trusses and junctions |
“Get answers in writing and include them in the contract — verbal assurances are not enough.”
Documenting Your Roofing Agreement
A clear, signed contract protects both you and the contractor from disputes over scope, materials and timing.
Put the scope of work in writing. List every material and labour item, naming timber, insulation and tiles where relevant. State what is excluded so there are no surprises.
Set firm start and completion dates and link payments to milestones. This protects your cash flow and encourages on-time delivery.
Warranties must be explicit. Ask for written guarantees for materials and workmanship, and confirm who is responsible for defects and how claims will be handled.
- Confirm inclusions and exclusions in the contract, including removal of old tiles and debris.
- Use payment stages tied to completed milestones rather than dates alone.
- Record the exact specification for timber, insulation and tiles to avoid later substitution.
“A written agreement is your best protection against poor workmanship and unexpected costs.”
Review the contract carefully and ask for clarification before you sign. We recommend keeping a copy of all documents and photos of completed milestones for your records.
Navigating Our Quote Request Process
Our quote request process helps you gather comparable proposals for labour, materials and finishes so you can make a cost‑aware choice.
How it works at buildingpricessouthafrica.co.za:
- Submit a brief and we will connect you with independent contractors who can visit site and prepare a final quote.
- You may request up to three quotes, or up to five options where available, so you can compare pricing and workmanship.
- Independent professionals handle site visits, final proposals and the actual building work; we do not employ builders or manage construction directly.
Why this helps you: seeing several offers makes it easier to check scope, labour rates, material choices and the specification for insulation and battens.
Check before you hire: confirm that the contractor lists timber sizes, insulation type and membrane details in writing. Ask for a clear breakdown of scope, access costs and any approvals.
“Use our quote request process to compare offers and select the best value for your project.”
We provide tools and pricing guidance so you can choose with confidence. Compare quotes, check references and keep the contracted specification for insulation and timber on file.
Ensuring Long Term Durability for Your Property
Durability over decades depends on good materials, correct detailing and regular checks. Use high-quality components and hire experienced installers to avoid recurring defects.
Keep valleys and gutters clear of debris to prevent ponding and water damage. Regular maintenance is a small cost compared with later repairs.
Invest in proper insulation and ventilation to protect your timber frame from rot and to maintain a healthy living environment. Schedule periodic inspections so a qualified professional can spot issues early and recommend repairs.
Follow these practical steps and you will preserve value and performance for many years.
Turn this into a budget with house extension costs and roof replacement costs.
FAQ
What is a roof tie‑in and why does it matter for joining new to existing structures?
A roof tie‑in is the method used to join a new covering to an existing covering so water, wind and loads transfer correctly. It matters because a poor tie‑in causes leaks, damp, structural stress and higher maintenance. For South African homes we check overlaps, flashing, ventilation and the junction detail against the existing roof type — tiled, slate or metal — before quoting.
How long does the tie‑in process typically take?
Duration depends on scope and access. A simple pitched roof junction with matching tiles and clear access can take one to two days. Complex work — changing pitch, installing box gutters, or structural alterations — may take several days to a couple of weeks. Your contractor should give day‑by‑day milestones in the quote.
What are the main cost factors I should expect?
Costs hinge on labour, materials, site access, and structural work. Expect to budget for scaffolding, new battens or trusses if needed, specialised flashing, membrane, insulation and skilled labour. Region and peak season affect rates. We list site access, material choices and approvals as the primary pricing drivers in every quote.
Which materials are commonly used for tie‑ins on pitched roofs?
Common materials include clay or concrete tiles, slate, timber battens, galvanised fixings, breathable underlay, and lead or code‑4 stainless steel flashings. For metal roofs you may use seamed sheeting, sealant and compatible fasteners. Insulation and ventilation components are added when required to prevent condensation.
What methods do builders use to join new coverings to old?
Common methods are stepped junctions, extended plane junctions and box gutter arrangements. Choice depends on pitch changes, existing detailing and drainage requirements. Each method has specific flashing and support needs to ensure a watertight connection.
When is a box gutter necessary and what should I check?
A box gutter is used where two roof planes meet at a low point or where a new extension meets an existing structure. Check fall (min 1:200 recommended), access for cleaning, lining material (GRP, lead or coated steel) and overflow provisions. Poorly detailed box gutters are frequent leak sources.
How do stepped junctions differ from extended plane junctions?
Stepped junctions use horizontal steps with flashings to follow differing heights, suitable for tiled roofs and small pitch changes. Extended plane junctions create a continuous plane over the junction and suit matching pitches. Both need correct underlay and flashing; the choice depends on geometry and drainage.
What are the typical failure points I should be wary of?
Watch for inadequate flashing, level mismatches, blocked valleys and poor sealing at penetrations. Flashing shortcuts and mismatched profiles cause most leaks. Ask your contractor to show details and specify materials in writing to avoid these issues.
What visual signs indicate poor workmanship after a tie‑in?
Look for water stains, peeling paint, mould on ceilings, displaced tiles, and debris build‑up in valleys. Standing water in gutters or box gutters, and new wet spots after rain, are clear warnings you need a remedial inspection.
How does ventilation and insulation affect a tie‑in?
Proper ventilation prevents condensation that can rot timber and reduce insulation performance. When you alter roof geometry add or adapt eaves and ridge vents and maintain continuous insulation without thermal bridges. Your quote should include moisture control measures where relevant. This pairs naturally with roof repair vs replacement.
Will a tie‑in require structural changes to existing trusses or rafters?
Sometimes. If the new junction increases load, changes pitch or removes supporting walls, you may need new trusses, reinforced rafters or additional beams. A structural assessment should be part of the site visit and included in the cost estimate if required.
What approvals or compliance items must I confirm before work begins?
Confirm local council approvals, SANS compliance for materials and any required roof‑safety plans. If you live in an estate or body corporate, obtain their sign‑off. Your contractor should note these items in the quote and advise on who arranges submissions. It reads well alongside roof design cost impact.
What questions should I ask a builder during the quote stage?
Ask about the exact method of junction, materials brand and guarantees, scaffold and access costs, timelines, who handles approvals, and warranty details. Request drawings or photos of proposed details and ask for a written scope with exclusions to avoid surprises.
How should I document the agreement with my contractor?
Get a written contract that lists scope, materials (brands where possible), start and completion dates, payment schedule, insurance and warranty terms. Keep correspondence and site photos. This documentation protects you and clarifies responsibilities for defects.
How do you request quotes through our platform and how many can you get?
You can request up to three independent quotes, or up to five options where available. Provide site photos, plans and access notes to speed responses. Independent contractors perform site visits and provide final quotes; we don’t guarantee the maximum number but we will match you with qualified local specialists.
How can I ensure long‑term durability after a tie‑in?
Insist on correct flashing, suitable materials for your climate, proper falls and regular maintenance. Schedule gutter cleaning and inspections every 12 months. Confirm warranty terms for materials and workmanship in writing so you have recourse if defects appear.
Ready to compare?